Composite Adhesives Market Insights and Growth Trends 2025 –2032
Music |
2025-10-01 04:51:18
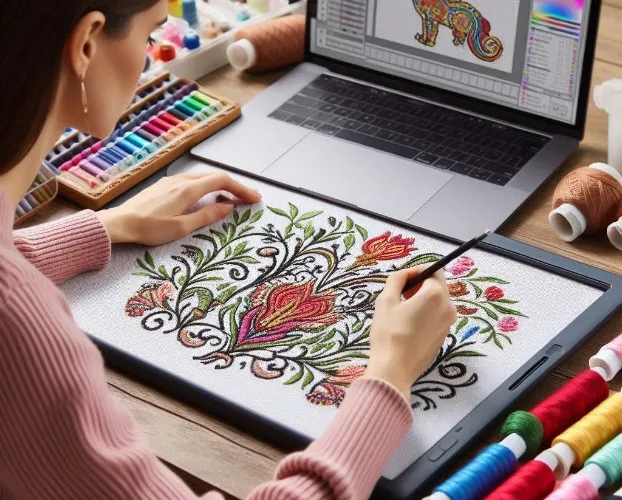
You’ve seen them—those breathtaking embroidered dog portraits that seem to leap off the fabric. The secret to their realism isn’t just a perfect outline; it’s the texture. Capturing the essence of a dog’s coat—whether it’s the sleek shine of a Labrador or the fluffy cloud of a Pomeranian—is what separates a good design from a great one. This is the ultimate challenge and joy for anyone looking to digitize dog embroidery designs. It’s in the tiny details where the biggest impact is made. Mastering fur texture transforms a simple stitch-out into a living, breathing tribute to a beloved pet. Let’s dive into the techniques that will bring your furry friends to life, one stitch at a time.
Think about what makes a dog recognizable. Often, it's the unique character of its fur. Is it wiry and rough? Long and silky? Short and spotted? The fur defines the breed and the individual animal.
A common mistake is to treat the entire coat as a single, flat area of fill stitches. This approach creates a stiff, unnatural look that resembles a stuffed animal more than a living dog. The goal of expert digitizing is to mimic the flow, direction, and depth of real fur. This creates movement, dimension, and an emotional connection that makes the portrait special. It’s the difference between a generic dog shape and their dog.
The first step to digitizing fantastic fur is to analyze your reference photo. You must become a student of canine coats. Break the dog’s fur down into key areas and types:
Short, Smooth Fur: (e.g., Boxers, Dobermans, Labradors) This fur lies close to the body. The challenge is to show the underlying muscle structure and the subtle shine of healthy fur without using heavy texture.
Long, Flowing Fur: (e.g., Shelties, Collies, Maltese) The goal here is to create soft, cascading layers that have volume and movement. You need to avoid a dense, matted look.
Curly or Wavy Fur: (e.g., Poodles, Bichons, Retrievers) This requires capturing tight curls or soft waves without the design looking chaotic or messy.
Double Coats & "Fluffy" Fur: (e.g., Huskies, Pomeranians, Samoyeds) This is all about creating immense depth and a soft, plush appearance that you can almost feel.
Wiry Fur: (e.g., Terriers, Schnauzers) The key here is texture and roughness, creating a prickly, coarse effect that defines the breed's character.
Your choice of stitch type is your most important decision. Each stitch creates a different visual and tactile effect.
Fill Stitches (But Not Like You Think): The standard fill stitch is useful for creating a base layer, especially for short fur. However, the secret is to never use it alone. Modify its angle and combine it with other stitches to break up the flatness.
Satin Stitches: Perfect for creating smooth, shiny highlights on short coats or for defining sleek areas like noses and eyelids. Use them sparingly within the fur to suggest light catching on glossy hair.
The Star of the Show: Motif Stitches & Manual Digitizing: This is where the magic happens. Most advanced digitizing software includes motif stitches (also called pattern fills or special fills). These are pre-programmed stitch patterns that can resemble fur, scales, or grass. A well-chosen fur motif can instantly create a realistic texture. Even more powerful is manually drawing individual stitch lines to follow the exact flow and direction of the fur in your photo. This is time-consuming but yields the most realistic results.
Now, let’s translate that analysis into a step-by-step action plan.
Trace and Zone: Start by outlining the major sections of the dog’s body. Don't digitize the entire dog as one object. Separate the head, back, legs, and tail. Within those, identify areas where the fur direction changes—like the cheek, the shoulder, or the ruff of the neck.
Map the Flow: This is the most critical step. Using your software's drawing tools, lightly map the direction of the fur growth in each zone. Fur doesn’t all grow in the same direction; it radiates from certain points. Your stitches must follow this natural flow. Stitching against the grain will instantly make the design look "off."
Layer for Realism: Real fur has depth. Build your design in layers.
Start with an Underlay: A good underlay not only stabilizes the fabric but can also help create a slight raise, adding a 3D effect that mimics undercoat.
Build the Base: Use a light-density fill stitch in the primary fur color to establish the base layer. Set the angle to follow your flow lines.
Add Texture and Depth: This is where you use your motif stitches or manually drawn stitches in slightly different shades. Add darker tones in recessed areas and lighter tones where the light hits. Keep the density low to medium to avoid a stiff feel.
Focus on the Face: The face is where everyone looks first. Pay meticulous attention to the fur around the eyes and muzzle. Use very short, fine stitches here. The direction of the fur on the bridge of the nose is often different from the cheeks. Capturing these subtle shifts is what creates a lifelike expression.
Embrace Color Blending: Rarely is a dog’s coat one solid color. Use thread colors that are very close in tone to create soft, natural shadows and highlights. Don’t be afraid to use multiple shades of brown, black, or white to build complexity and depth. The gradual transition between colors is what makes fur look soft and real.
Less is More: It’s tempting to pack in stitches for detail, but over-digitizing is a common mistake. High density causes puckering and eliminates the soft, textile-like quality you want for fur. Err on the side of lower density.
Stitch Length Matters: Vary your stitch lengths. Longer stitches can suggest flowing hair, while very short stitches are perfect for tight curves on faces and paws.
Test on Similar Fabric: Always stitch a test run on a scrap of your final fabric. Fur texture that looks perfect on stiff denim may get lost on a soft knit. Testing allows you to adjust density and pull compensation.
Study Real Life: The best teacher is observation. Look at your own dog or high-quality photos. Notice how the light falls on its coat, how the fur parts, and how it moves. Try to replicate that feeling with your stitches.
Digitizing a dog's fur is a meticulous art form. It demands patience, observation, and a willingness to experiment. It’s about understanding that a German Shepherd’s back is stitched differently than a Cocker Spaniel’s ear. By moving beyond flat fills and embracing the flow, layering, and texture of real fur, you elevate your work from a simple craft to a personalized masterpiece.
The reward is immense. There’s nothing quite like the moment a client sees their beloved companion’s face and unique coat rendered faithfully in thread. That emotional reaction is powered by your attention to the smallest of details. So, take a deep breath, study your photo, and start stitching with intention. You’re not just creating an embroidery; you’re stitching a personality.