NIFT coaching in Bhopal
Other |
2025-12-16 18:03:50
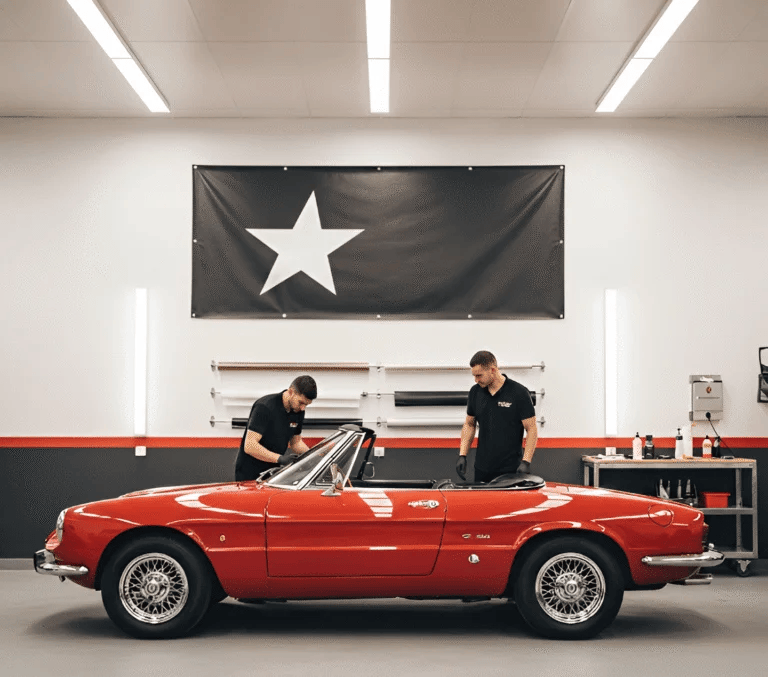
Fleet vehicles are essential for businesses, delivering services and products while representing your brand. Fleet Wraps Tucson are a cost-effective way to promote your business, protect vehicle surfaces, and create a professional, consistent look across all your vehicles. A proper installation process ensures durability, flawless appearance, and maximum impact for your brand.
This article explains the step-by-step installation process of Fleet Wraps Tucson, guiding business owners and fleet managers through each stage. Whether you are upgrading your vehicles for marketing or protection, understanding the process will help you get the best results.
Before diving into the installation process, it is essential to understand the value of Fleet Wraps Tucson.
Fleet wraps turn your vehicles into moving billboards. With professionally designed graphics, your brand is visible to thousands of people every day.
A quality wrap protects the vehicle’s paint from scratches, UV rays, and minor abrasions. This extends the life of your fleet and keeps it looking new for longer.
Compared to traditional advertising methods, fleet wraps provide long-term exposure for a one-time investment.
Fleet wraps create a consistent look across all company vehicles, enhancing professionalism and brand recognition.
A successful fleet wrap begins with careful planning and design.
Decide the purpose of your wrap. Is it for branding, advertising, or vehicle protection? The goals will influence colors, graphics, and messaging.
Measure each vehicle to ensure the design fits properly. Take note of curves, windows, and edges that may affect how the wrap is applied.
Designs are created using professional software to scale accurately to each vehicle. This ensures the wrap looks consistent and visually appealing.
Preparation is critical for a successful installation.
The vehicle must be thoroughly washed and free from dirt, grease, and wax. Even small particles can prevent the wrap from adhering properly.
Inspect the paint for scratches, dents, or rust. Repairs may be necessary to ensure a smooth surface for the wrap.
Ensure the vehicle is completely dry before applying the wrap. Moisture can interfere with adhesion and cause bubbles or peeling.
The type of vinyl and finish used affects the durability and appearance of the wrap.
High-quality, durable vinyl is recommended for fleet wraps. It should withstand sun exposure, weather conditions, and regular washing.
Choose between matte, gloss, or satin finishes depending on your branding and aesthetic preference. Matte finishes reduce glare, while gloss finishes enhance color vibrancy.
Ensure the vinyl has a strong adhesive that bonds well to the vehicle surface without damaging the paint when removed.
Before application, the vinyl is cut and prepared according to the vehicle’s shape.
Vinyl is cut into sections that match the panels of the vehicle. This ensures precision during installation.
Graphics, logos, and text are cut or printed separately and aligned for a professional appearance.
Edges are trimmed to fit around handles, mirrors, and other protrusions for a seamless look.
The actual installation requires skill and patience.
Position each vinyl panel carefully on the vehicle. Align the edges and check for accuracy before sticking it down.
Use a squeegee to press the vinyl onto the surface, removing air bubbles and ensuring smooth adhesion.
Heat guns are used to stretch and conform the vinyl to curves and edges. Proper heat application prevents wrinkles and ensures durability.
If the design uses multiple layers or colors, each layer is applied sequentially, allowing for precise alignment.
After the main application, finishing ensures the wrap looks professional.
Edges are carefully tucked and sealed to prevent peeling over time.
A final pass with heat ensures the vinyl is fully bonded to the vehicle surface.
Check for air bubbles, wrinkles, or misalignments and correct any issues immediately.
After installation, proper care helps maintain the wrap’s appearance and longevity.
Allow the wrap to cure for a recommended period, usually 24 to 48 hours, before washing or driving extensively.
Use mild soap and water, avoiding harsh chemicals or abrasive cleaning tools. Hand washing is preferred to protect the wrap.
Inspect the wrap periodically for wear or damage, especially after long trips or exposure to harsh weather.
Minor repairs or touch-ups can extend the life of the wrap and maintain a professional appearance.
The installation of Fleet Wraps Tucson involves careful planning, preparation, and professional techniques to ensure a durable, visually striking result. From initial design and vehicle preparation to precise application and maintenance, each step contributes to the wrap’s effectiveness in promoting your brand and protecting your fleet.