Turning a simple image into a stitch-ready file might sound technical at first. However, once you understand the process, it becomes much easier. If you want to convert an image to an embroidery file, you need the right approach, tools, and a bit of patience. Many beginners assume that software does everything automatically, but that is not always true. In fact, learning how to convert image to embroidery file properly can make the difference between a clean design and a messy stitch-out.
In this guide, I will walk you through each step in a clear and practical way. Along the way, I will share tips that come from real experience, so you can avoid common mistakes.
Understand What It Means to Convert Image to Embroidery File
Before jumping into tools, it helps to know what actually happens during the process. When you convert an image, you are not just changing file format. Instead, you are creating stitch instructions for a machine.
Embroidery digitizing takes a flat image and turns it into a sequence of stitches. These stitches tell a digital embroidery machine where to move, when to change thread, and how dense the design should be.
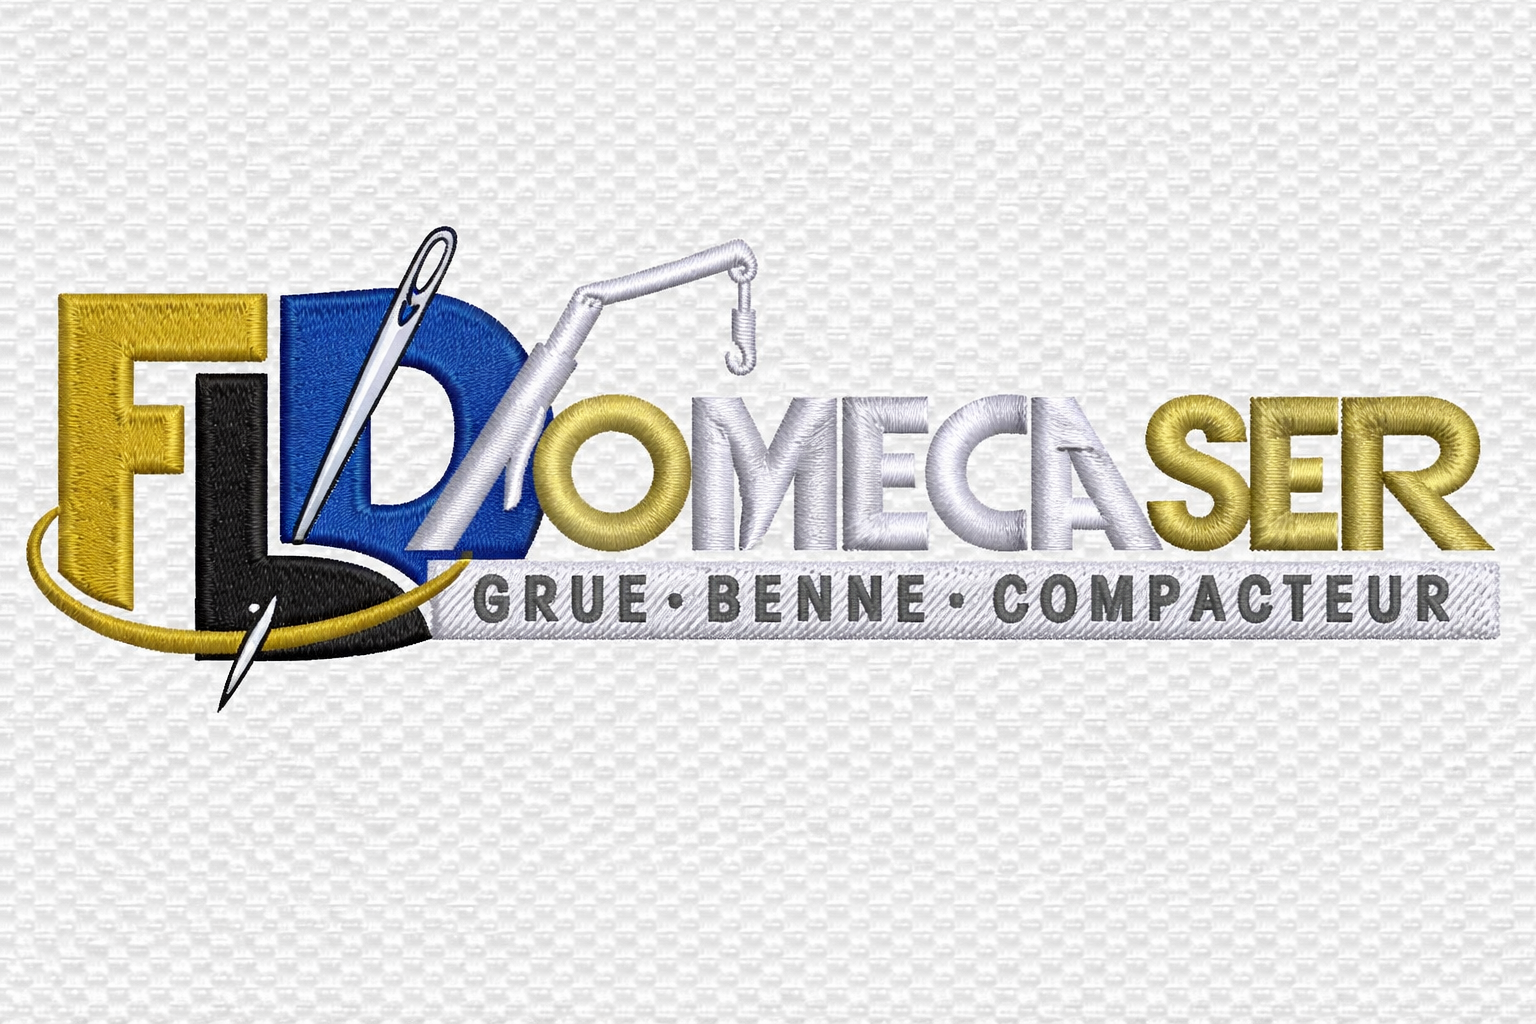
For example, a simple logo with bold shapes is easier to handle than a photo with shading. That is why Logo Digitizing often produces better results when the artwork is clean and simple.
Choose the Right Image Before You Convert Image to Embroidery File
Not all images work well for embroidery. Therefore, you should start with a high-quality file.
A few tips to keep in mind:
- Use images with clear edges
- Avoid too many colors
- Prefer vector formats if possible
If you only have a JPG, you may need to convert it using tools that handle jpg to vector file conversion. This step helps improve clarity before digitizing.
I once tried digitizing a low-resolution logo for a client. At first, it looked fine on screen. However, when stitched, the edges appeared jagged. Since then, I always double-check image quality before starting.
Select the Best Embroidery Digitizing Software
The next step is choosing the right embroidery digitizing software. There are many options available, both paid and free.
Popular choices include:
- Wilcom (professional use)
- Hatch Embroidery
- Brother PE-Design
- Ink/Stitch (free embroidery digitizing software option)
Each program to digitize embroidery has its own learning curve. However, most of them offer similar features such as stitch types, pathing, and preview tools.
If you are just starting, try a beginner-friendly tool first. Later, you can move to advanced digitizing software for embroidery as your skills improve.
Import the Image into Digitizing for Embroidery Software
Once your software is ready, import your image. This is where the actual work begins.
Most digitizing for embroidery software allows you to drag and drop files directly. After importing, you can resize the image to match your final design dimensions.
Keep in mind that resizing later can affect stitch density. So, it is better to set the correct size at the start.
Trace the Design to Convert Image to Embroidery File
Now comes the most important part. You need to trace the image manually or use auto-digitizing features.
Auto-digitizing is quick, but it often lacks accuracy. On the other hand, manual tracing gives you full control.
While tracing, focus on:
- Outlines
- Fill areas
- Stitch direction
For example, satin stitches work well for borders, while fill stitches suit larger areas. Good digitizing for embroidery depends on choosing the right stitch type for each section.
Assign Stitch Types and Directions Carefully
After tracing, you need to assign stitch types. This step defines how your design will look when stitched.
Common stitch types include:
- Satin stitch for text and borders
- Fill stitch for large areas
- Running stitch for fine details
Direction also matters. If stitches go in the wrong direction, the design may pull fabric unevenly.
Think of it like brushing hair. If you brush in the wrong direction, it looks messy. The same idea applies here.
Adjust Stitch Density and Underlay Settings
Next, fine-tune the technical settings. This includes stitch density and underlay.
Density controls how close stitches are placed. Too dense, and the fabric may pucker. Too loose, and the design looks incomplete.
Underlay acts as a foundation. It helps stabilize the fabric and improves the final look.
Many embroidery digitizing services focus heavily on this step because it directly affects quality.
H2: Preview the Digital Machine Embroidery Designs
Before exporting, always preview your design. Most embroidery digitizing software includes a simulation feature.
This preview shows how the digital machine embroidery designs will stitch out. It also highlights issues like thread breaks or inefficient paths.
Take your time here. Fixing problems at this stage is much easier than after stitching.
Export the File for Your Digital Embroidery Machine
Once everything looks good, export the file in the correct format. Different machines use different formats such as:
Check your digital embroidery machine requirements before saving.
At this point, your image has successfully been converted. You now have a file ready for stitching.
Test Stitch the Design for Best Results
Even after exporting, the process is not complete. Always run a test stitch.
Testing helps you:
- Spot alignment issues
- Check thread tension
- Confirm design quality
I usually test on scrap fabric first. It saves time and avoids wasting materials.
If something looks off, go back and adjust the design. This step separates average work from professional embroidery digitizing service results.
When to Use Professional Embroidery Digitizing Services
Sometimes, doing it yourself is not the best option. Complex designs, such as jacket back digitizing or applique embroidery digitizing, require advanced skills.
In such cases, online embroidery digitizing services can save time and deliver better results.
Many businesses in the USA rely on professional embroidery digitizing services for consistent quality, especially for bulk orders.
Tips to Improve Your Embroidery Digitizing Skills
Practice plays a big role in learning. However, a few tips can speed things up:
- Start with simple designs
- Learn stitch types thoroughly
- Study how fabrics behave
- Use templates when possible
Also, explore home sew home digital embroidery design ideas to practice regularly. Small projects help build confidence over time.
Conclusion
Learning how to digitize for embroidery may feel tricky at first. However, once you break it into steps, the process becomes manageable.
From choosing the right image to testing the final stitch, each step matters. With practice and the right digitizing software for embroidery, you can create clean and professional designs.
Whether you handle it yourself or use an embroidery digitizing service, the goal remains the same. You want a design that looks great both on screen and on fabric.
FAQs
How to digitize for embroidery as a beginner?
Start with simple designs and beginner-friendly embroidery digitizing software. Focus on learning basic stitch types and practice regularly.
Can I use free embroidery digitizing software?
Yes, tools like Ink/Stitch are good starting points. However, paid software often provides more features and better control.
What is the best program to digitize embroidery?
It depends on your needs. Beginners can start with simple tools, while professionals often prefer advanced embroidery digitizing software like Wilcom or Hatch.